

Day 1: Arrive Etosha Heights Reserve
Day 1: Your first night on safari will be spent in the exclusive Etosha Heights Reserve on the edge of the infamous Etosha National Park. Settle in with a sundowner and dinner under the star-spangled skies.
In Etosha Heights, cool and comfortable Safarihoek Lodge will be your home. Perched high on a ridge, the 11 thatch chalets have camera-loving vistas across the reserve and all have en-suite bathrooms with private loos and indoor showers. At the main area, there’s a wine cellar, indoor lounge and outdoor bar, as well as a swimming pool for the hot summer days and a large deck with a fireplace for chilly winter evenings.
Days 2 & 3: Etosha Heights Private Reserve
Over the next two days you’ll track white rhino on 4×4 drives, walk across the plains learning about the finer details of the bush, and experience Namibia’s nightlife on after-dark game drives.
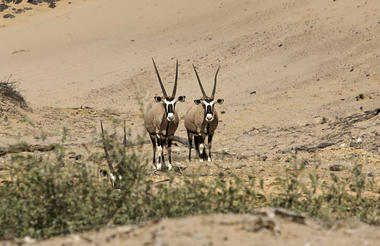
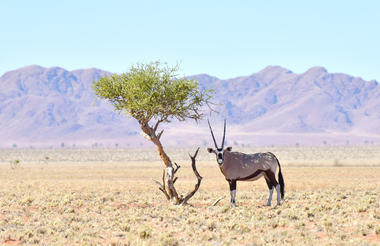
Etosha Heights Private Reserve is a gem in Namibia’s wildlife-watching crown with sightings of the elusive white rhino. Crowds of eland, zebra, gemsbok and kudu jostle for space with elephant and buffalo, and there are plenty of predators around too.


Day 4: Transfer to Hoanib Valley
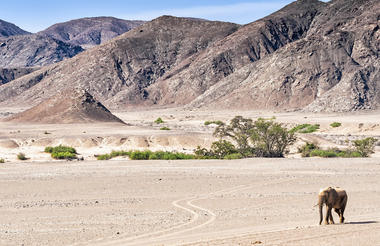
Today, you’ll transfer to the Hoanib Valley in Kaokoland, a rugged corner of Namibia characterised by sandy riverbeds and rolling valleys as far as they eye can see.
Hoanib Valley Camp is tucked deep into the dry riverbeds and towering dunes of Kaokoland. A joint venture between the local communities and Dr Julian Fennessy, Africa’s foremost giraffe expert, the camp is an elegant, intimate affair that immerses you into the wilds of the desert.
Days 5 & 6: Hoanib Valley
This vast, arid landscapes of Kaokoland may be remote but there’s plenty to discover, including large populations of black rhino and the majestic desert-adapted elephant. You’ll also have the chance to meet and spend time with the nomadic Himba people.
For the mysterious desert-adapted elephant, you can’t do much better than the Hoanib Valley, where breeding herds roam the sandy riverbeds, digging deep holes for the last vestiges of water.
Day 7: Transfer to Sossusvlei
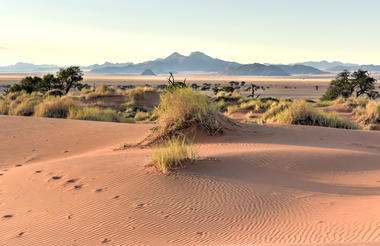
One of Namibia’s most iconic scenes has to be the apricot dunes of Sossusvlei in the Namib Desert, and now’s the time to see them for yourself. Cameras at the ready!
At Sossusvlei and Swakopmund, we’ll help you choose from a variety of camps and lodges that suit your safari-style. But rest assured, all camps that we use meet our own, very high standards.
Days 8 & 9: Sossusvlei
You’ve got two full days to get to grips with all that Sossusvlei has to offer, from the tree skeletons at Deadvlei to the fascinating Sesriem canyon, and all the activities in between.
Day 10: Transfer to Swakopmund
Today, you’ll head back north to Swakopmund, where the crashing waves of the Atlantic Ocean are a welcome sight after all that sand.
Day 11: Swakopmund
There’s plenty to do in Swakopmund. Spend the day paragliding, quad biking or sandboarding on the dunes, or, if a little R&R is called for, wander around the quirky shops and boutiques in the town.


Day 12: Depart Swakopmund
Epic adventure over, it’s time to bid farewell to Namibia and begin your journey home.

